MotionKit is a WordPress animation toolkit designed for adding interactive visual effects without writing JavaScript or custom code. It connects a WordPress site to a visual editor where you can select page elements, apply ready-made animation presets, adjust their settings, and publish the result.
It can be useful for site owners, designers, and agencies that want more polished page transitions, scroll effects, hover interactions, and animated content while keeping their usual WordPress building workflow.
What Is MotionKit for WordPress?
MotionKit is a visual animation suite built around GSAP-style animation presets and effects for WordPress websites. Rather than configuring effects solely inside the regular WordPress editor, it uses a connector plugin to open the live site in an external visual editing environment.
From there, you can select the part of the page that should animate, choose an effect, configure how and when it runs, then save the animation back to the site.
The available animation ideas include:
- Preset animations for text, images, and mixed content blocks
- Scroll-triggered animation
- Animations that play as the page scrolls
- Click and hover interactions
- Cursor movement and cursor reveal effects
- Tilt effects
- Custom animations with configurable triggers
The key appeal is that a complete section, a single image, a headline, a paragraph, or another individual element can receive an animation without hand-coding the behavior.
Who Should Use a WordPress Animation Tool?
MotionKit is best suited to WordPress users who already have the main page design in place and want to add movement as a finishing layer. It is especially relevant if visual design matters to the site but building custom JavaScript animations is outside the project scope.
Good use cases
- Service business sites: Reveal benefit cards or service summaries as visitors reach a section.
- Portfolio sites: Add subtle image or project-card interactions.
- Landing pages: Give key headings, pricing sections, and calls to action a clearer visual entrance.
- Creative and wellness brands: Use restrained scroll effects to reinforce a calm or premium visual style.
- Agencies: Organize client sites into projects and save useful animation setups for future work.
It is less appropriate when the page is not yet structurally complete. Animation should enhance a clear layout, not compensate for unclear messaging, weak hierarchy, or missing content.
How MotionKit Works With WordPress
The process begins with the Motion Kit Connector plugin. After installing it in WordPress, connect the plugin with your MotionKit account through the MotionKit settings.
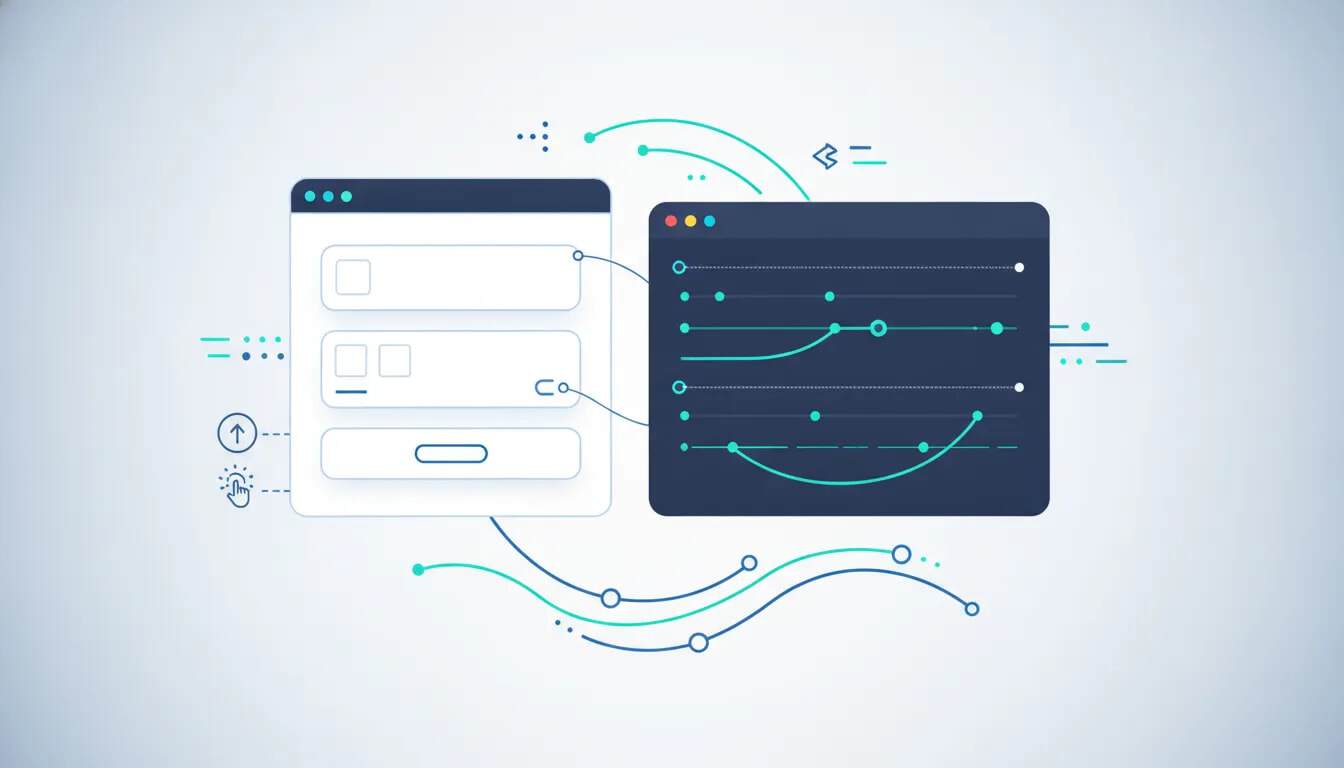
The site is then opened in MotionKit’s visual editor. The editor displays the page itself alongside a controls panel, allowing you to identify and select specific on-page elements.
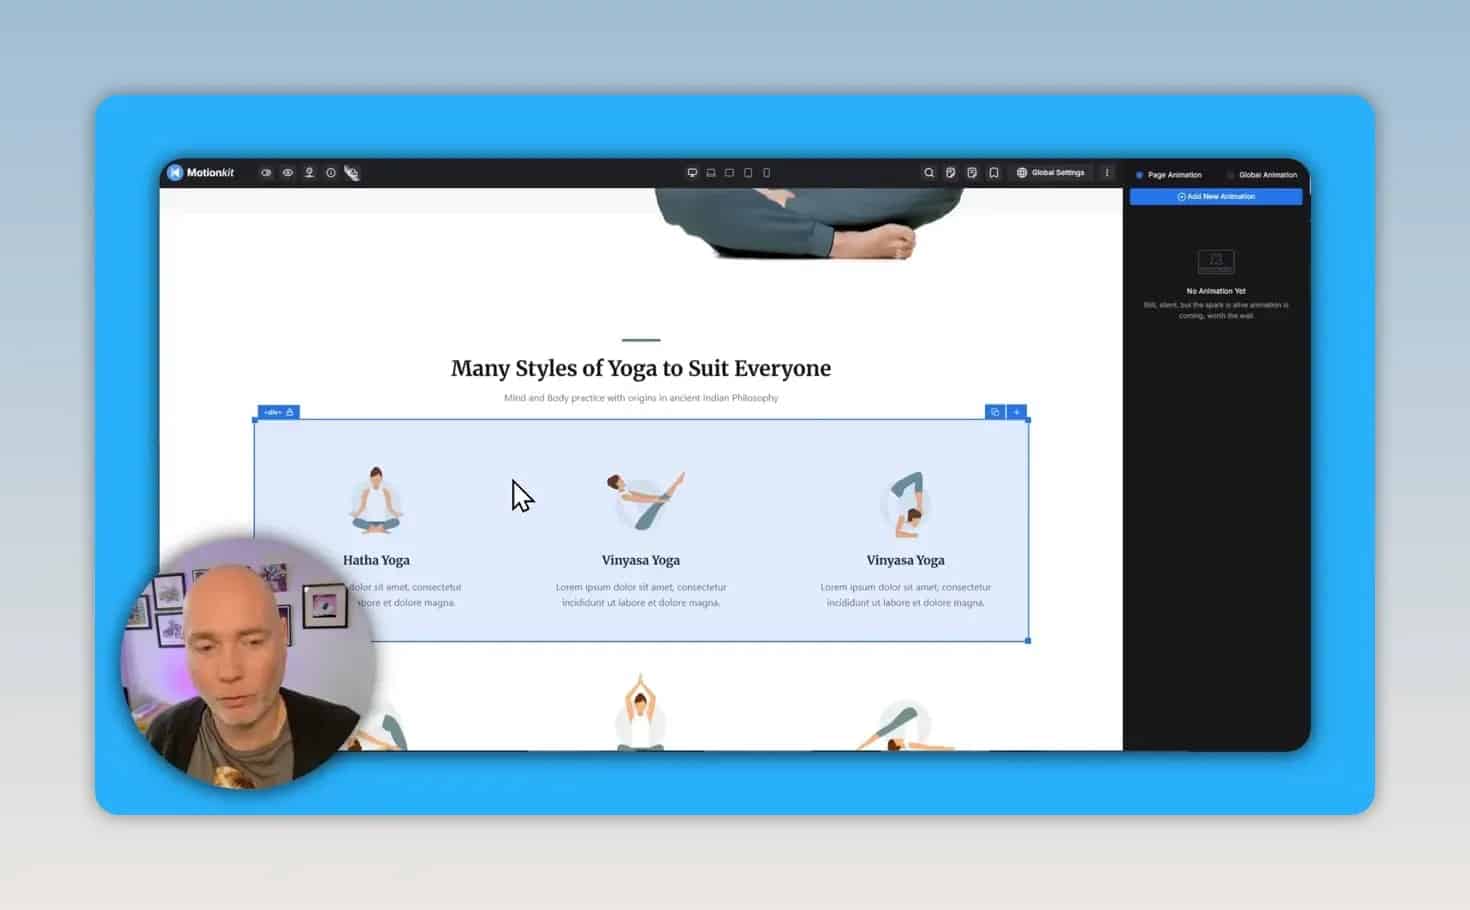
In practical terms, the workflow looks like this:
- Build or import the WordPress page layout first.
- Install and connect the Motion Kit Connector plugin.
- Open the site in the visual editor.
- Select a section, image, text block, card, or other target element.
- Create an animation and choose a preset or custom setup.
- Fine-tune timing, triggers, and device visibility.
- Save the change and use the published preview to check the final result.
The editor supports selecting at different levels. For example, a preset can be applied to an entire group of cards, or only to the image or text within one card. This makes it easier to control whether the page feels coordinated or intentionally staggered.
How to Apply an Animation Preset
Animation presets are the fastest route to a working effect. After selecting an element, create an animation and open the preset library. Presets can be filtered by category, which helps match the effect to the selected content type.
A text-specific preset is not always right for a section that combines photos and copy. In that case, choose a preset intended for mixed content or animate the image and text separately.
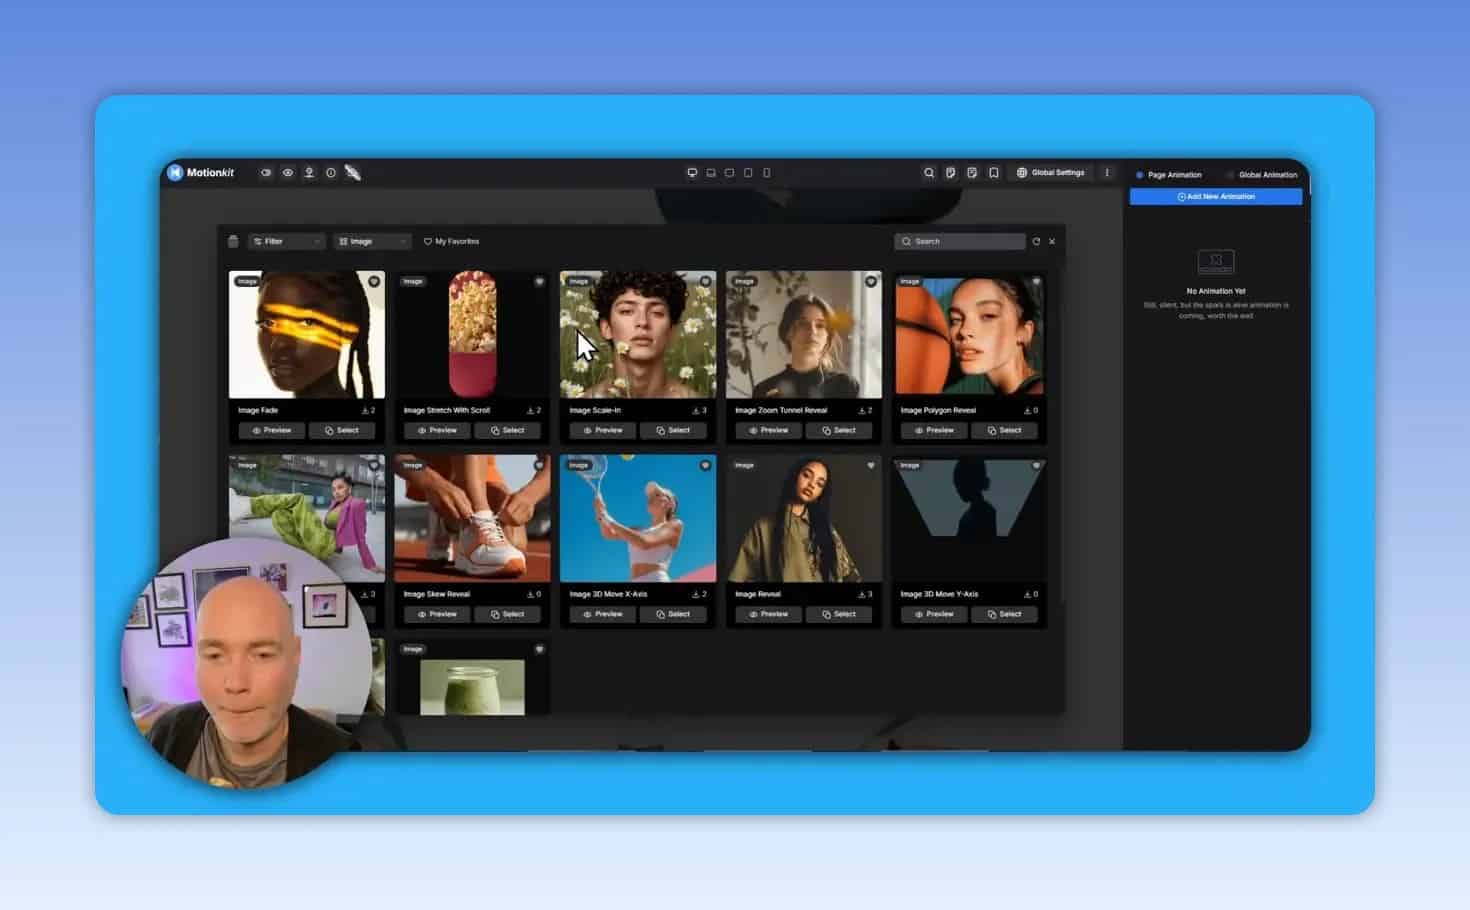
A practical preset selection framework
- For a headline: Choose a subtle entrance that supports reading order.
- For a content card: Use an effect that introduces the card without distracting from the text.
- For an image: Consider an image-focused preset, tilt, or reveal treatment.
- For a whole section: Prefer coordinated movement that makes the group feel like one unit.
- For a pricing area: Keep effects brief and restrained so price and call-to-action details remain easy to scan.
Use the built-in preview before applying an effect. Seeing the behavior at selection time makes it easier to avoid mismatched styles and helps keep animation consistent across the page.
Configure Duration, Triggers, and Responsive Behavior
Applying a preset is only the first step. MotionKit also exposes controls for tailoring how the effect behaves. The available options include animation duration and responsive controls for desktop, laptop, tablet landscape, tablet, and mobile.
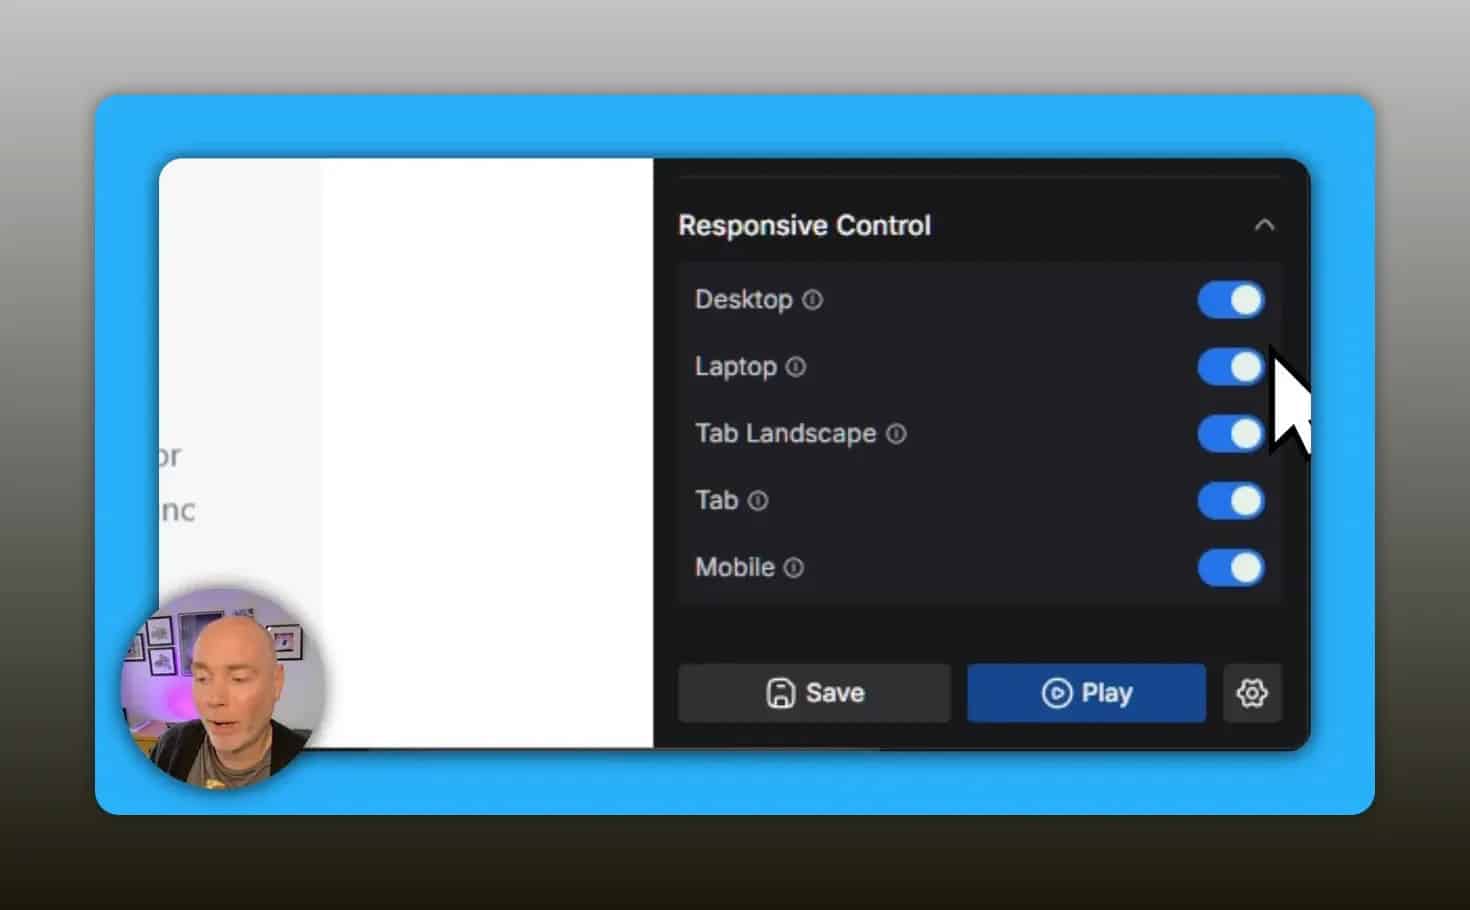
Responsive controls matter because an effect that feels polished on a large desktop screen may not have the same impact on a smaller touch device. Check each relevant layout and disable an effect where it does not improve the experience.
Animation trigger options
When building a custom animation, first choose the trigger. The editor provides trigger choices for scroll animation, page load animation, and click or hover animation.
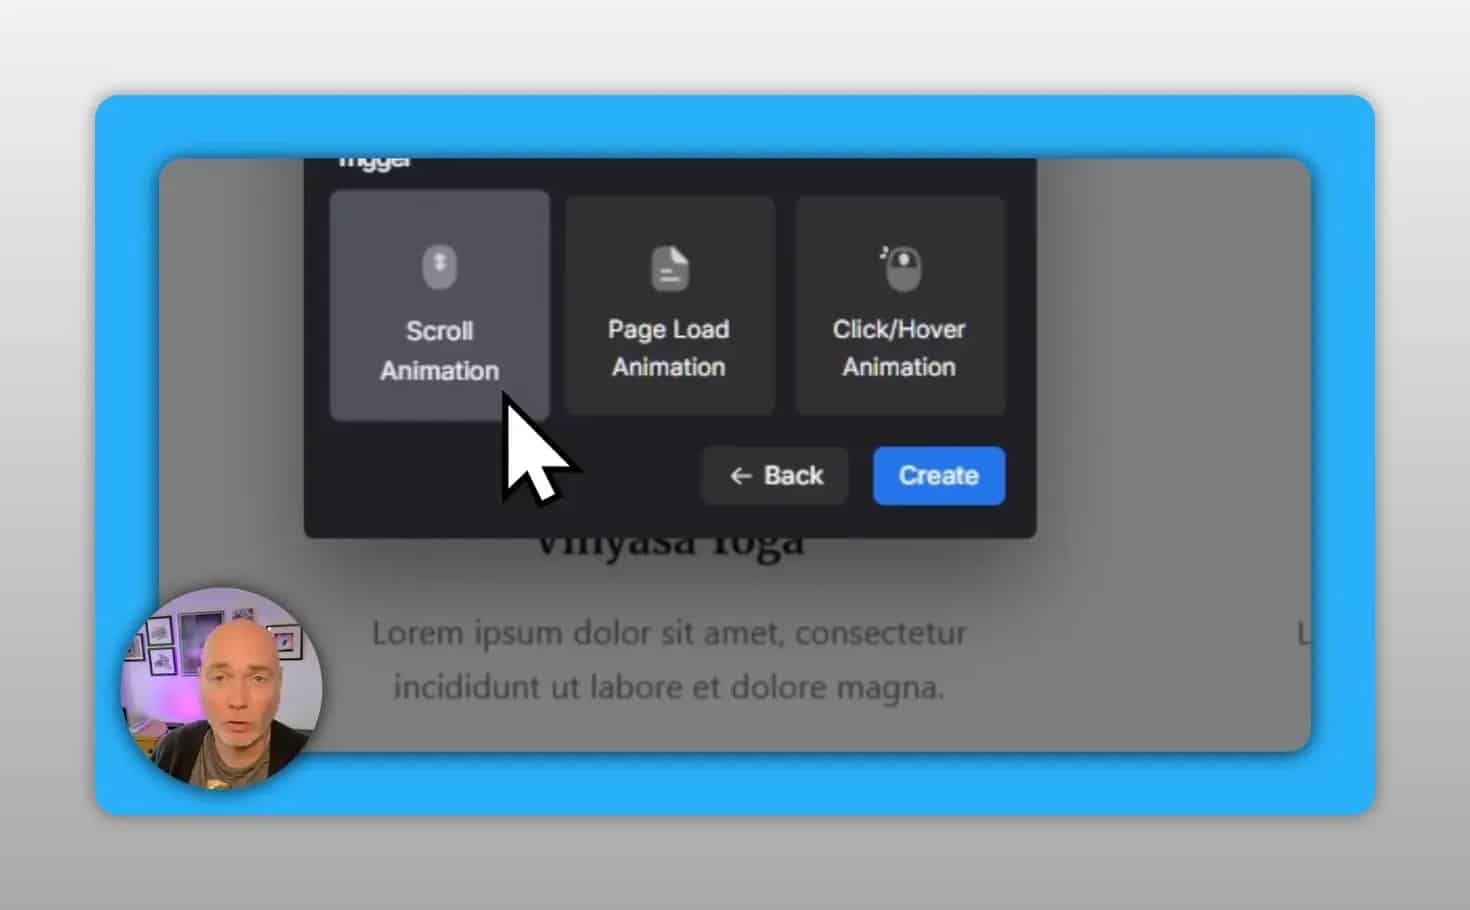
Choose the trigger based on the job the element needs to do:
- Page load: Useful for a hero area or a key opening message, provided the movement is brief.
- Scroll trigger: Useful for revealing content as someone reaches a new section.
- Scroll-linked behavior: Better for effects that intentionally move in response to page scrolling.
- Click or hover: Useful when an interaction invites exploration, such as a visual card or image detail.
MotionKit also includes a timeline view for creating and managing more involved custom animations. This provides a route beyond presets when a project needs a more specific sequence of effects.
Best Practices for Adding Website Animations
Animations can strengthen visual hierarchy, but more movement is not automatically better. A good rule is to give every effect a purpose: introduce important content, demonstrate interactivity, or create a natural transition between sections.
Start with a small number of meaningful effects
Pick one or two important areas on a page, such as the opening section, a feature grid, or a call-to-action. Apply an animation, preview it, and only add more if the page still feels clear and balanced.
Match the animation to the content
Use an effect that fits the element. A group of features may work well with a section-level reveal. A standalone photo may deserve an image-oriented effect. A dense pricing block usually needs minimal movement so its information remains the focus.
Keep timing intentional
Duration has a major effect on perceived quality. Long effects can delay the point of the content, while very fast effects can feel abrupt. Adjust timing until the motion supports the content rather than calling attention to itself.
Test the published page, not only the editor
Save the configuration, open the site’s published preview, and scroll through the page as a visitor would. Confirm that animations appear in the intended place, do not overlap unexpectedly, and remain appropriate on the devices you have enabled.
Common MotionKit Animation Mistakes
Animating before the page design is finished
Build the page first. Changes to layout, content, or section structure can change what should be animated and may require effects to be reassessed.
Applying an effect to the wrong selection level
If every item in a group should move together, select the parent section. If only one image or heading needs emphasis, target that element instead. Selecting too broadly can produce unnecessary movement, while selecting too narrowly can make a section feel disjointed.
Using a text effect on mixed content
Preset categories should guide the decision. Text-only motion may not suit a block containing both images and written content. Select a mixed-content option or assign separate effects to the individual pieces.
Forgetting device-specific settings
Do not assume that an animation should run everywhere. Review the responsive controls and intentionally choose which screen types should display the effect.
Skipping the documentation for advanced effects
MotionKit includes documentation, a community area, and a support ticket system. The documentation covers setup, requirements, quick-start guidance, animation effects, triggers, and advanced options. It is particularly useful before attempting scroll reveals, cursor effects, tilt interactions, or custom timeline work.
Can MotionKit Be Used on a Local WordPress Site?
The demonstrated setup required the WordPress site to be online so the external service could access it. A purely local installation may therefore not be suitable for this workflow. If you normally develop locally, plan to test MotionKit on an accessible staging or live environment before making it part of a production process.
MotionKit Features for Agencies
For agencies handling several WordPress sites, the MotionKit dashboard includes project organization for client sites. It also allows saved animations to be reused, which can help maintain consistency and reduce repetitive setup work across similar projects.
This is most useful when an agency has a repeatable design system. For example, a preferred card reveal, image hover treatment, or section entrance can be saved and used again where it suits the project.
MotionKit Pricing and License Considerations
The pricing shown for MotionKit started at $59 for a single-site option, with higher tiers covering more sites. The options shown included licenses for 10 sites, 100 sites, and up to 1,000 sites, making the larger plans more relevant for agencies or teams managing multiple client installations.
Pricing and license terms can change, so check the current MotionKit offer and license options before purchasing. Consider the number of WordPress sites you expect to manage, whether reusable animations would save time, and whether the available effects fit the projects you build.
Frequently Asked Questions
Do you need to know code to use MotionKit?
No. MotionKit is designed around a visual editor, element selection, presets, and configuration controls rather than manually writing JavaScript.
Can you animate images and text separately?
Yes. The visual editor can target an entire section or individual elements within it, such as an image, headline, or text block.
What triggers can be used for custom animations?
The available custom trigger choices include scrolling, page load, and click or hover interactions. MotionKit also supports scroll-based effects and advanced animation options through its broader toolkit.
Can animations be disabled on mobile?
Yes. The responsive controls include device-level options for desktop, laptop, tablet landscape, tablet, and mobile.
Is MotionKit suitable for client work?
It can be, particularly where multiple sites need to be organized into projects and selected animation setups need to be saved for reuse. Choose the license tier that matches the expected number of sites.
Key Takeaway
MotionKit provides a no-code way to add WordPress animations through a connected visual editor. The most effective approach is simple: finish the page structure first, animate only the elements that benefit from movement, configure the right trigger and device behavior, and test the published result before considering the work complete.